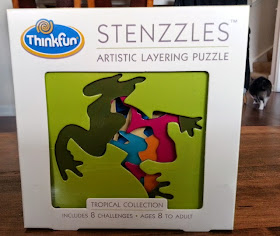
A couple of months ago, I reviewed a puzzle from ThinkFun called Stenzzles. This puzzle comes with 8 stenzzles and 8 layering challenges.
I loved the Tropical Collection that I purchased, but wasn't very interested in their other Stenzzle themes. So I thought I would try making one of my own!
If you'd like to make your own Stencil puzzle set, you will need some heavy cardstock paper, a printer, an exacto knife and a cutting board. I buy cardstock at Staples in mass quantities. I use it all the time for homeschool They don't have a large color selection, but this pack has 5 nice colors. The blue is sometimes hard to see when you print on it, but for stencils it is perfect!
First you need to download one of the stencil sets that I've come up with. (If you have some cool stencils at home, you can use those too. You'll want fairly large ones that fit nicely into a 5 1/2" square.) I created two themes. One is a flower theme that comes with a tulip, leaves and stem, and 3 regular flowers. You can download it by clicking the stencil above.
The other theme is a Space Stencil Set. This one has a comet, satellite, sun, Saturn, and a rocket. You'll have to forgive me here, the rocket looks rather like Darth Vader's helmet! But I'm not an artist. Of course, that means that anyone can draw a stencil, so you can try drawing out your own stencil set too!
Next, you'll need to print the stencils out on some heavy cardstock paper. I used my color printer which feeds the heavy paper through more easily than my b/w laser printer. Try clicking on an option like "scale to fit media" or something like that before you print (it will depend on your printer software). This will keep the printer from creating huge margins on your paper and shrinking down the image. But even it your images shrink a bit, as long as they all print the same size, you should be good to go!
The next step is to cut out all your stencils. Place your stencils on your cutting board, then use the exacto knife to cut out the stencil bits. Try to cut around the outside of the black lines so you don't end up with a lot of black markings on your finished stencils. I didn't do a perfect job myself, so don't sweat it too much. If you have older kids who you trust with an exacto knife, you can let them help with this part!
Now you'll want to cut the outer edges off. Your finished stencils should measure around 5 1/2" square. I used my handy-dandy paper cutter, but you could always use your exacto knife and a ruler to guide it straight.
Once all the stencils are cut, you're ready to play the game! Oh...did I mention that you might want to cut out 2 sets??!! With 2 sets, one person can create a layer challenge for someone else to match! Like so...
The first person can turn and flip the stencils in any way they like, then stack them all up. The second person must recreate the first stack just by visual inspection. It's actually quite fun and sometimes rather challenging!
If you're playing with younger kids, try using only 2 or 3 stencils at a time. This will be less frustrating for them.
When you finished cutting everything out, you'll have a big pile of interesting shapes left. Challenge your little artists to create something with them! They could glue them onto a sheet of construction paper or just play around, rearranging the shapes as they like.
I also thought it would be fun to make the stencils out of foam sheets. You can still print off the stencils onto plain paper, then cut out the middles and use them as a guide to cut the foam sheets.
The foam comes in a lovely selection of colors! These sheets measure 5 1/2" by 8 1/2" so you only need to cut off a bit of one end for the correct stencil size.
I cut out the space stencil set on the foam sheets. These are sturdier than the paper versions, so they might be more fun for the younger ones.
Here are the foam stencils layered up! They make a tall stack!
And again, you have some cool cut-out shapes to play with when you're done!
If you've got creative kids, let them draw their own stencils for the puzzle. They can create their own theme with their favorite things!
Have fun stenciling!


No comments:
Post a Comment